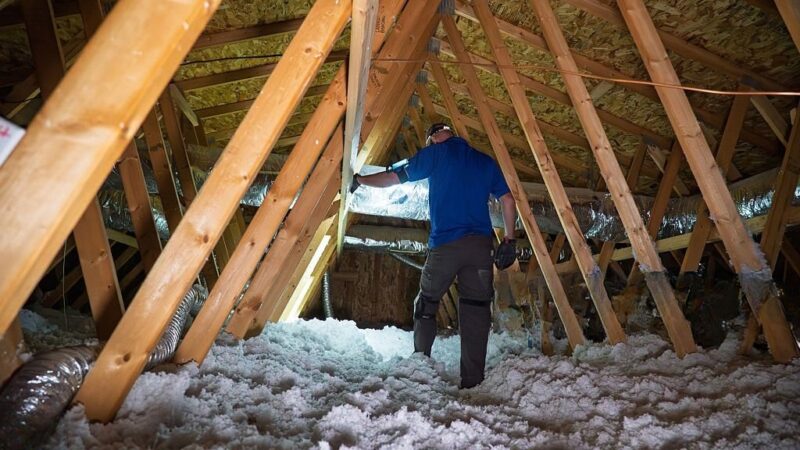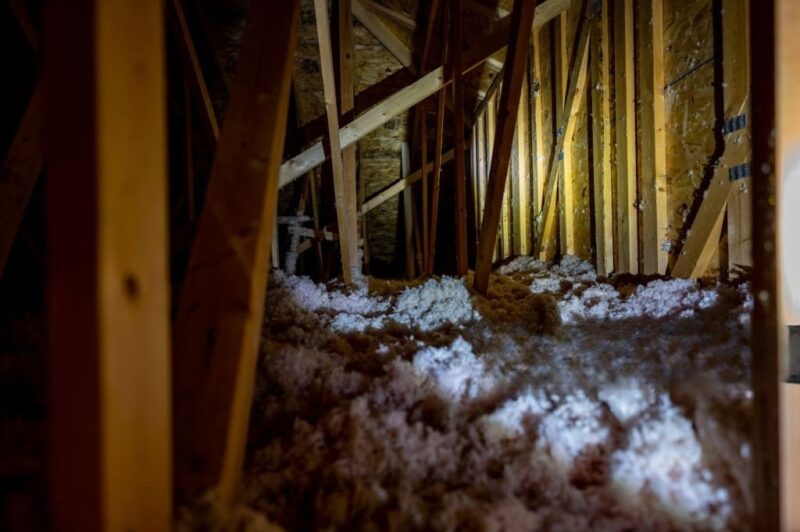


Installing attic insulation can help limit unwanted heat transfer and support a more comfortable, energy-efficient home, but getting good results starts before the new insulation goes in. Moisture problems, air leaks, pest damage, blocked ventilation, damaged ductwork, and electrical concerns should be identified before they are covered. Preparing the attic first also gives installers better access to the areas that need attention and helps ensure the insulation can be installed with consistent coverage.
For Florida homeowners, attic preparation is particularly important because high temperatures and humid conditions can affect how the attic, insulation, ventilation, ductwork, and HVAC system work together. Whether you are adding insulation to an existing attic or replacing damaged material, taking time to evaluate the space beforehand can help prevent avoidable installation problems. This guide explains how to prepare your attic for insulation installation, what to inspect before work begins, and when professional evaluation may be appropriate.
Step 1: Inspect Your Existing Attic
Before adding or replacing insulation, start by understanding what is already in the attic. A thorough inspection can reveal insulation deficiencies, moisture concerns, pest activity, and building components that need to remain accessible. Identifying these conditions before installation helps prevent new insulation from concealing problems that should be addressed first.
Check Existing Insulation Type and Condition
Determine what type of insulation is already present, such as fiberglass batts, blown-in fiberglass, cellulose, or spray foam, and examine its overall condition. Existing insulation that remains clean, dry, properly installed, and free from significant damage may not need to be removed. Knowing the material also helps determine whether it can appropriately remain in place or be supplemented as part of the planned insulation strategy.
Look for Thin, Missing, or Compressed Areas
Inspect the attic for bare sections, gaps, uneven coverage, compressed fiberglass, or loose-fill insulation that has settled or been displaced. These areas may provide less thermal resistance than the surrounding insulation. Pay particular attention to attic edges, access points, framing, and areas where previous electrical, plumbing, roofing, or HVAC work may have disturbed the material.
Identify Moisture or Water Damage
Look for damp or discolored insulation, water stains, damaged roof sheathing, or other signs of moisture intrusion. Roof leaks, plumbing problems, condensation, and improperly routed exhaust ducts are among the possible sources. New insulation should not simply be installed over wet or moisture-damaged areas. The source should be identified and corrected, and affected materials should be evaluated before installation continues.
Check for Pest Activity
Droppings, nesting materials, unusual odors, tunneling, and displaced insulation can indicate current or previous pest activity. Rodents and other pests may compress or contaminate insulation and create inconsistent coverage. Active pest problems and appropriate entry points should be addressed before new insulation is installed, and significantly contaminated material may require removal and cleanup.
Note Ductwork, HVAC, and Electrical Components
Identify ductwork, air handlers, drain lines, wiring, junction boxes, recessed lighting, and other equipment located in the attic. These components may require service access, specific clearances, or additional attention before insulation is installed. Documenting their locations helps installers plan appropriate coverage without burying equipment, blocking access, or overlooking existing HVAC, duct, or electrical concerns.
Step 2: Decide Whether Existing Insulation Should Stay
Preparing an attic for new insulation does not always mean removing everything that is already there. Existing insulation may continue to provide useful thermal resistance if it remains in suitable condition. Before deciding to remove, supplement, or replace it, evaluate the material for moisture, contamination, pest damage, compression, settlement, and overall coverage.
When Existing Insulation May Remain
Existing insulation may be suitable to leave in place when it is clean, dry, free from significant pest contamination, and generally well distributed across the intended thermal boundary. Its type, depth, condition, and compatibility with the planned insulation should also be considered. Keeping suitable insulation can avoid unnecessary removal while allowing it to continue contributing to the attic’s total thermal resistance.
When Adding More Insulation May Be Appropriate
If the existing insulation is in good condition but does not provide sufficient thermal resistance or consistent coverage, adding compatible material may be appropriate. Additional insulation can help increase total R-value and address thin areas when properly installed. Before adding more, however, air leaks, moisture concerns, ventilation pathways, and other attic problems should be evaluated so they are not buried beneath the new material.
When Insulation May Need to Be Removed
Removal may be appropriate when insulation is significantly wet, contaminated, pest-damaged, deteriorated, or otherwise unsuitable to remain. Insulation may also need to be moved or removed when access is necessary to address underlying moisture damage, air leakage, electrical concerns, or other building issues. The extent of removal should depend on the condition of the attic rather than assuming all existing material needs to be discarded.
Why Age Alone Does Not Determine Replacement
Older insulation does not automatically need replacement simply because it has been in the attic for many years. Its condition, coverage, installed thickness, moisture exposure, contamination, compression, and settlement are generally more useful indicators of whether work is needed. Older material that remains in suitable condition may continue to perform, while relatively new insulation can require attention if it has been damaged or installed incorrectly.
Step 3: Address Moisture Problems
Moisture problems should be identified and addressed before new attic insulation is installed. Water from roof or plumbing leaks, improperly routed exhaust air, or condensation can affect insulation and surrounding building materials. Adding new insulation over damp areas can conceal the warning signs and expose the new material to the same unresolved moisture source.
Check for Roof and Plumbing Leaks
Inspect the attic for signs of water entering through the roof, flashing, roof penetrations, plumbing lines, or connections. Water stains, damp wood, visible dripping, or discoloration may indicate a leak that needs further evaluation. Roofing or plumbing problems should be appropriately repaired before insulation is added to the affected area.
Look for Wet or Stained Insulation
Wet, damp, matted, or discolored insulation can indicate current or previous moisture exposure. Water can affect insulation performance differently depending on the material and severity of the exposure, and nearby framing or sheathing may also require evaluation. Avoid simply covering stained or wet insulation with fresh material without first determining what caused the moisture.
Check Bathroom Exhaust Venting
Bathroom exhaust fans remove moisture-laden air from the living space and should discharge through an appropriate exterior termination rather than intentionally into the attic. Check accessible exhaust ducts for disconnected, damaged, or improperly routed sections. If humid bathroom air is entering the attic, the ventilation problem should be corrected before insulation work proceeds.
Correct the Moisture Source Before Insulating
Insulation can slow heat transfer, but it cannot repair a roof leak, fix plumbing, reroute an exhaust duct, or resolve every condensation problem. Determine where the moisture is coming from and address the underlying cause first. Once the source has been corrected and affected materials have been evaluated, the attic can be prepared for insulation without simply covering an unresolved problem.
Step 4: Address Pest Problems
Pest activity should be addressed before new attic insulation is installed. Rodents and other animals can disturb, compress, displace, or contaminate existing insulation while moving through or nesting in the attic. Installing fresh material without addressing the infestation and affected insulation can conceal the problem and allow additional damage to occur.
Look for Droppings, Nests, and Damaged Insulation
Inspect accessible attic areas for droppings, nesting materials, unusual odors, tunneling, or insulation that has been pushed aside or compressed. These signs may indicate current or previous pest activity. Pay attention to areas near attic edges, penetrations, ductwork, and other locations where animals may have traveled or nested.
Address Active Pest Activity
If there are signs of an active infestation, the pest problem should be appropriately managed before insulation work begins. Simply removing damaged insulation does not prevent pests from returning if they are still entering or living in the attic. Depending on the situation, a qualified pest-control professional may be needed to identify the pest and determine an appropriate response.
Evaluate Contaminated Insulation
Insulation affected by pest waste, nesting materials, carcasses, or other contamination should be evaluated before new material is installed. The appropriate response depends on the type and extent of contamination. Significantly affected insulation may require professional removal and cleanup rather than being covered with another layer of insulation.
Address Entry Points Before Reinsulating
Replacing damaged insulation without addressing how pests entered the attic can allow the same problem to return. Potential access points should be identified and appropriately addressed as part of the pest-control process, while preserving necessary attic ventilation and other building functions. Once the pest issue, entry points, and contaminated materials have been handled, the attic can be prepared for new insulation.
Step 5: Air Seal Before Adding Insulation
Before installing new attic insulation, evaluate the attic for uncontrolled air leakage between the conditioned living space and the attic. Insulation and air sealing work together but serve different purposes, so adding insulation alone may leave important leakage pathways unresolved. Addressing appropriate gaps and penetrations first can also prevent them from becoming difficult to reach once additional insulation is installed.
Understand Air Sealing vs Insulation
Insulation primarily slows heat transfer through the building assembly, while air sealing limits uncontrolled air movement through cracks, gaps, and penetrations. Conventional materials such as fiberglass and loose-fill insulation should not be assumed to create a complete air barrier. A well-prepared attic considers both thermal resistance and air control rather than expecting insulation to perform both functions.
Identify Common Attic Air Leaks
Air leakage can occur around framing connections, duct chases, dropped soffits, attic access points, wiring openings, plumbing penetrations, and other gaps between the attic and conditioned rooms below. The location and severity of leaks vary by home. Identifying these areas before adding insulation makes it easier to determine which openings should be appropriately sealed.
Check Plumbing and Electrical Penetrations
Pipes, wiring, cables, and other components often pass through the ceiling plane and can leave gaps around their penetrations. Appropriate openings may be candidates for air sealing, but electrical components and heat-producing fixtures can have specific clearance and material requirements. These areas should be evaluated carefully rather than applying sealant or insulation indiscriminately around every penetration.
Check the Attic Access
Attic hatches, pull-down stairs, and access doors can interrupt both the thermal and air boundaries. Check for visible gaps around the opening and consider appropriate weatherstripping or other air-sealing measures where suitable. The access panel itself may also need insulation, but any improvements should preserve safe, convenient entry to equipment and systems that may require future service.
Why Air Sealing Comes Before Insulation
Once new batts or loose-fill insulation cover the attic floor, many air leakage points become harder to locate and access. Evaluating and addressing appropriate leaks beforehand allows the air-control layer and insulation to work together more effectively. It also reduces the likelihood of having to disturb newly installed insulation later to reach gaps that could have been handled during preparation.
Step 6: Inspect HVAC Equipment and Ductwork
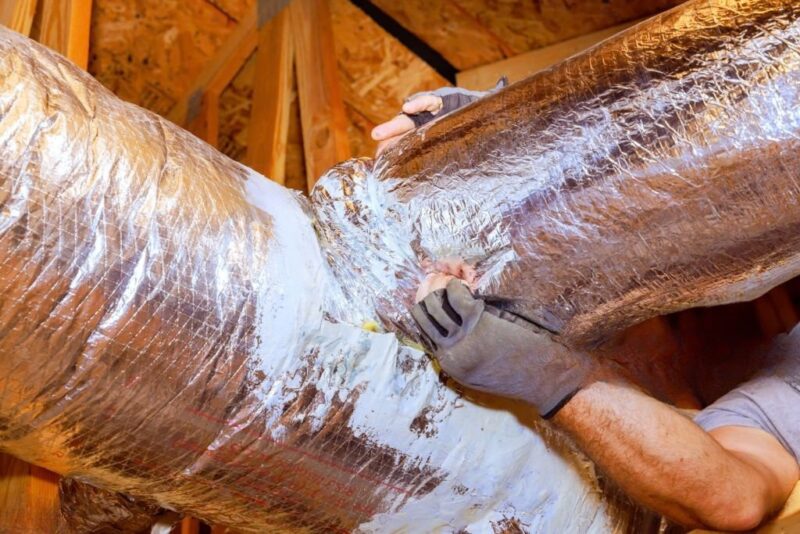
If HVAC equipment or ductwork is located in the attic, inspect these components before adding insulation. Damaged ducts, deteriorated duct insulation, or restricted equipment access can affect comfort, energy efficiency, and future serviceability. New attic insulation should work alongside the HVAC system rather than conceal existing problems or make important components difficult to reach.
Check for Damaged or Disconnected Ducts
Look for visible signs of torn, crushed, loose, or disconnected duct sections and damaged connections. Duct leakage can allow conditioned air to escape before it reaches the intended rooms and may contribute to comfort or efficiency concerns. Building insulation will not repair these problems, so damaged ductwork should be appropriately evaluated before the attic is reinsulated.
Look at Existing Duct Insulation
Ducts running through a conventional vented attic can be exposed to temperatures considerably different from the conditioned air moving through them. Check accessible duct insulation for torn, missing, compressed, or deteriorated areas. Problems with duct insulation should be addressed separately rather than assuming additional attic-floor insulation will correct them.
Maintain Access to HVAC Equipment
Air handlers and other HVAC components located in the attic need adequate space for inspection, maintenance, and repair. New insulation should not obstruct access panels, drain components, electrical connections, filters, or other service areas. Safe access routes should also remain available so technicians can reach equipment without unnecessarily compressing or displacing insulation.
Address Duct Problems Before They Are Covered
Installing new insulation can make some duct sections and connections more difficult to inspect or access later. Identifying visible leakage, damage, or insulation deficiencies beforehand provides an opportunity to address them before installation. Evaluating the HVAC system and attic insulation together can help ensure the project improves the attic without simply hiding mechanical problems beneath new material.
Step 7: Check Attic Ventilation
Before installing new insulation, determine how the attic is designed to manage airflow. Conventional vented attics depend on designated intake and exhaust openings, while unvented assemblies use a different approach to controlling heat, air, and moisture. Understanding the existing strategy helps prevent new insulation from interfering with ventilation or unintentionally changing how the attic assembly performs.
Determine Whether the Attic Is Vented or Unvented
A conventional vented attic typically has insulation at the attic floor, with outdoor air moving through designated intake and exhaust vents. Certain unvented assemblies instead place the thermal and air-control layers at or near the roofline. Because these designs function differently, homeowners should identify the existing attic configuration before changing insulation placement or ventilation.
Locate Soffit and Exhaust Vents
In a vented attic, identify soffit or other intake vents near the lower portions of the roof as well as ridge, gable, or other exhaust vents where applicable. Knowing where these openings are located helps installers avoid accidentally covering them. The exact ventilation arrangement can vary by home, so the existing system should be evaluated rather than assuming every attic uses the same configuration.
Keep Ventilation Pathways Clear
Intended airflow pathways need to remain unobstructed for a vented attic to function as designed. Insulation, stored belongings, debris, or other materials should not interfere with designated intake and exhaust openings. Maintaining these pathways is especially important near the eaves, where insulation coverage and ventilation space must be coordinated carefully.
Check Existing Baffles or Vent Chutes
Baffles or vent chutes are commonly used near the eaves to maintain an airflow channel between soffit vents and the attic while helping keep insulation out of that space. Inspect existing baffles for damage, displacement, or missing sections where appropriate. If additional baffles are needed, they should be installed in a way that matches the attic and roof configuration.
Avoid Blocking Soffit Vents With Insulation
Loose-fill insulation can drift or be blown into soffit areas, while fiberglass batts can be pushed too far into the eaves and restrict intake openings. Blocking these vents can interfere with the attic’s intended ventilation. Before insulation installation begins, soffit vents and their airflow channels should be identified and protected so the new insulation provides coverage without obstructing the ventilation system.
Step 8: Identify Electrical Components and Required Clearances
Electrical components should be identified before new attic insulation is installed. Wiring, junction boxes, recessed lighting, and other equipment may have specific requirements for clearance, insulation contact, or future access. Inspecting these areas beforehand helps prevent components from being accidentally buried and provides an opportunity to address visible electrical concerns before insulation makes them harder to reach.
Locate Wiring and Junction Boxes
Identify visible wiring, electrical connections, and junction boxes throughout the areas being insulated. Although wiring may be surrounded by insulation in many approved installations, junction boxes and other components may need to remain accessible. Damaged wiring, questionable connections, or other apparent electrical problems should be evaluated rather than simply covered with new insulation.
Check Recessed Lighting
Recessed light fixtures extending into the attic require special attention because their insulation-contact requirements can vary. Some fixtures are rated for direct contact with insulation, while others require specified clearance from insulating materials. Confirm the fixture type and applicable requirements before placing insulation around or over recessed lighting.
Identify Components That Should Not Be Buried
Not every electrical or heat-producing component should simply disappear beneath fiberglass or loose-fill insulation. Equipment requiring service access, specific clearances, or protection from insulation should be identified before installation begins. This is particularly important with blown-in insulation, which can quickly conceal components that were previously visible.
When to Consult an Electrician
A qualified electrician should be consulted when wiring appears damaged, electrical components seem improperly installed, fixture ratings cannot be confirmed, or required clearances are unclear. Insulation installers should not attempt electrical repairs outside their expertise. Resolving these concerns before insulation is added helps keep electrical work accessible and allows the insulation project to proceed with the appropriate safety considerations.
Step 9: Clear and Prepare the Attic Workspace
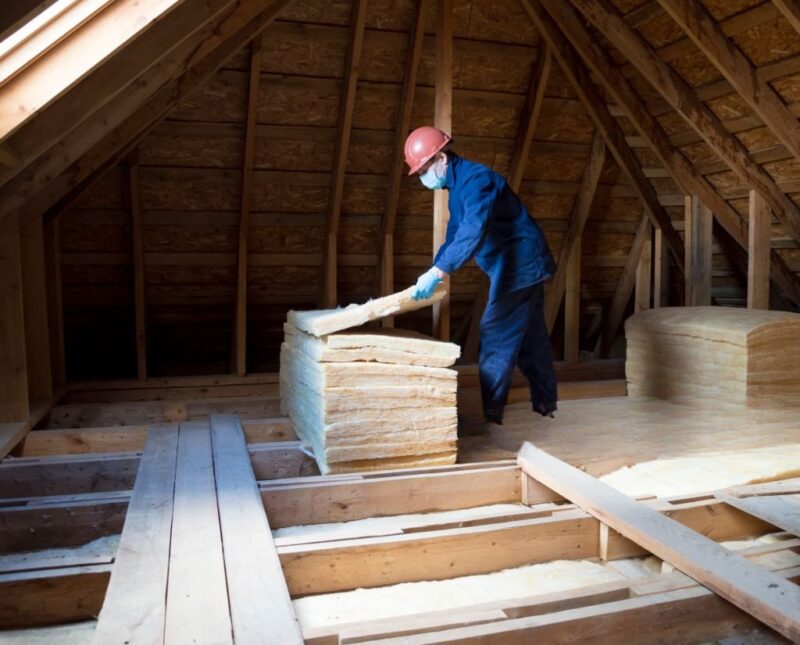
A clear attic gives installers better access to the areas that need insulation and reduces the chance of stored belongings interfering with the work. Before installation day, remove unnecessary clutter, identify safe access routes, and make sure HVAC equipment and other components remain reachable. Preparing the workspace can also help protect existing insulation from unnecessary compression or displacement.
Remove Stored Items and Clutter
Remove boxes, decorations, furniture, and other stored belongings from areas where insulation will be installed. Items left directly on insulation can compress fiberglass or displace loose-fill materials, while clutter may prevent installers from achieving consistent coverage. Clearing the space also makes it easier to inspect the attic for moisture, pest activity, air leaks, and other concerns before work begins.
Create Clear Access for Installers
Make sure installers can safely reach the attic opening and the areas where work is planned. Clear obstacles around the access point and discuss any difficult-to-reach sections of the attic with the contractor beforehand. Inside the attic, designated structural walking surfaces should be used where available rather than assuming the ceiling below can support foot traffic.
Keep HVAC Service Areas Accessible
If an air handler or other HVAC equipment is located in the attic, avoid storing belongings or placing insulation in ways that restrict necessary service access. Access panels, drain components, electrical connections, filters, and other serviceable areas may need to remain reachable. Preserving access can make future inspection, maintenance, and repairs easier without unnecessarily disturbing newly installed insulation.
Prepare the Attic Hatch or Access Door
The attic access should be easy to open and free from surrounding clutter before installation begins. The hatch, pull-down stairs, or access door should also be considered as part of the home’s thermal and air boundaries. Appropriate insulation and air sealing may help reduce heat transfer and leakage around the opening, provided the access remains safe and functional.
Protect Existing Insulation From Foot Traffic
Repeatedly walking across existing insulation can compress fiberglass or displace loose-fill materials, creating uneven coverage and thermal weak points. When movement through the attic is necessary, use appropriate structural pathways or designated walking areas rather than stepping directly onto insulated ceiling areas. After work is completed, any disturbed insulation should be checked and restored to the intended coverage where appropriate.
Step 10: Plan Attic Storage Carefully
If you use the attic for storage, consider how that space will work with the new insulation before installation begins. Boxes, flooring, and other stored items can compress or displace insulation when placed directly over it, potentially creating areas with reduced thermal resistance. Storage should be planned around the intended insulation depth while preserving safe access to HVAC, electrical, plumbing, and other building systems.
Avoid Storing Items Directly on Insulation
Boxes, containers, boards, and other belongings should not simply be placed on top of exposed insulation. Their weight can flatten fiberglass or disturb loose-fill materials, reducing the consistency of the insulation layer. Stored items can also make it harder to inspect the attic or reach areas that may require future maintenance.
Prevent Compression and Displacement
Fiberglass insulation generally provides less total thermal resistance when compressed below its intended thickness, while loose-fill insulation can be pushed aside by storage or foot traffic. Either condition can create thermal weak points. If attic storage is necessary, the storage arrangement should avoid relying on the insulation itself to support weight.
Account for the Required Insulation Depth
Storage plans should consider how much space the insulation needs to maintain its intended depth and R-value. Installing flooring directly over insulation that extends above the framing can compress the material. Any proposed storage platform should account for the insulation strategy, structural requirements, ventilation, and applicable clearances rather than reducing insulation thickness simply to create more storage space.
Maintain Access to Building Systems
Attic storage should not block access to air handlers, ductwork, electrical components, plumbing, drain lines, attic ventilation, or other equipment that may need inspection or service. Clear pathways and appropriate working space should remain available where required. Planning these areas before insulation installation can help balance storage needs with thermal performance and future serviceability.
Step 11: Determine the Right Insulation Strategy
Once existing attic problems have been identified and addressed, the next step is deciding what insulation approach fits the home. The right strategy depends on the existing insulation, attic design, desired thermal resistance, available space, ventilation, moisture conditions, HVAC and duct locations, and applicable building requirements. Rather than choosing insulation based on a single feature, consider how the material will function as part of the entire attic assembly.
Evaluate Existing Insulation Depth and R-Value
Determine the type, approximate depth, coverage, and condition of the insulation already present. R-value measures resistance to heat flow, but the effective performance of an attic also depends on proper installation. Gaps, compression, uneven coverage, and settlement can reduce thermal resistance, so the evaluation should consider more than the deepest or best-insulated section of the attic.
Choose an Appropriate Insulation Material
Different insulation materials have different installation, thermal, air-control, moisture, and space considerations. The appropriate choice depends on where the insulation will be installed and how the attic is designed to manage heat, air, and moisture. Existing insulation compatibility, required clearances, future access, budget, and project goals should also be considered before selecting a material.
Fiberglass and Blown-In Insulation
Fiberglass is available as batts, rolls, and loose-fill material. Batts can work well in suitable framing spaces when carefully fitted without gaps or excessive compression, while blown-in fiberglass can provide coverage across irregular attic floors and around many obstructions. With either approach, achieving the intended depth and consistent coverage is important, and the material should not block ventilation openings or components requiring clearance.
Cellulose Insulation
Cellulose is commonly installed as loose-fill insulation across attic floors and can conform around framing and irregular spaces. Its thermal performance depends on appropriate installed depth and density, and settlement should be considered when planning the installation. Existing moisture problems should be addressed before cellulose or other insulation is added.
Open-Cell and Closed-Cell Spray Foam
Spray foam can provide thermal resistance while also contributing to air control when properly selected and installed. Open-cell foam is generally lighter and more vapor permeable, while closed-cell foam is denser, typically provides a higher R-value per inch, and has lower vapor permeability. Because spray foam can change how an attic manages heat, air, and moisture, the foam type and application location should be selected based on the overall building assembly rather than assuming one is universally better.
Consider Attic-Floor vs Roof-Deck Insulation
In many conventional vented attics, insulation is installed at the attic floor to separate conditioned living areas from the unconditioned attic. Certain unvented assemblies instead locate insulation and air control at the roof deck, changing the attic’s thermal boundary. Moving from one strategy to another can affect ventilation, moisture behavior, roof conditions, and HVAC equipment or ductwork located in the attic, so substantial changes to the assembly should be professionally evaluated before installation.
What Not to Do Before Attic Insulation Installation
Preparing an attic is as much about avoiding the wrong steps as completing the right ones. New insulation should not be used to conceal moisture, contamination, air leakage, damaged building systems, or other unresolved conditions. Avoiding these common mistakes can help ensure the insulation is installed as part of a properly functioning attic assembly rather than simply adding material over existing problems.
Do Not Cover Wet or Contaminated Insulation
Avoid installing new insulation directly over material that is wet, significantly stained, pest-contaminated, or otherwise damaged. Adding a fresh layer does not correct the source of moisture or remove contamination and may make the problem harder to identify later. Determine the cause, address it appropriately, and evaluate affected materials before proceeding.
Do Not Block Soffit Vents
In a conventional vented attic, soffit vents help provide intake airflow and should not be covered with batts or loose-fill insulation. Baffles or vent chutes may be used where appropriate to help maintain an open airflow pathway near the eaves. Before installation, identify the attic’s ventilation strategy so insulation does not interfere with openings that are intended to remain clear.
Do Not Ignore Air Leaks
Adding insulation without evaluating air leakage can leave gaps and penetrations unresolved beneath the new material. Conventional insulation primarily addresses heat transfer and should not be expected to provide complete air sealing. Appropriate leakage points are generally easier to access before the attic floor is covered with additional insulation.
Do Not Cover Electrical or HVAC Problems
Damaged wiring, questionable electrical components, leaking or disconnected ducts, and HVAC equipment concerns should be evaluated before new insulation makes them difficult to access. Insulation cannot repair these systems, and certain components may require clearances or ongoing service access. Qualified electrical or HVAC professionals should address problems that fall outside the insulation contractor’s scope.
Do Not Remove Existing Insulation Unnecessarily
Existing insulation does not automatically need to be removed before additional material is installed. If it remains clean, dry, appropriately installed, and free from significant damage or contamination, it may be suitable to keep or supplement. Evaluate its condition and compatibility with the planned upgrade before paying for or undertaking complete removal.
Do Not Change the Attic Strategy Without Evaluation
Moving insulation from the attic floor to the roof deck or introducing spray foam can change the attic’s thermal and air boundaries. These changes may also affect ventilation, moisture behavior, roof conditions, ductwork, and HVAC equipment located in the attic. Avoid converting between vented and unvented approaches without evaluating how the entire attic and roof assembly is intended to function.
Why Port Charlotte Homeowners Choose Dale’s AC
Preparing an attic for insulation involves more than choosing a material and installing it at the right depth. Existing insulation, air leakage, moisture, ventilation, ductwork, and HVAC equipment can all influence the appropriate approach. At Dale’s Air Conditioning & Heating, we consider these conditions together so homeowners can make informed decisions about their attic insulation and indoor comfort needs.
Serving Southwest Florida Since 1974
Dale’s AC has served Port Charlotte and surrounding Southwest Florida communities since 1974. Our decades of local experience have given us familiarity with the cooling, ductwork, attic insulation, and indoor comfort concerns that can affect homes throughout the region.
Experience With Florida Attics
Florida attics can experience substantial heat and humid conditions, and many also contain ductwork or HVAC equipment that needs to remain accessible. Our team can evaluate existing insulation coverage, attic ventilation, visible moisture concerns, ductwork, and other relevant conditions before recommending an insulation approach.
Understanding Florida Heat and Humidity
Southwest Florida’s climate makes heat and moisture important considerations when preparing an attic for insulation. Insulation can help limit unwanted heat transfer, but it does not control humidity or correct moisture problems by itself. We consider how insulation works alongside air sealing, ventilation, HVAC operation, and other parts of the home.
HVAC and Attic Insulation Experience
Because we work with both HVAC systems and attic insulation, we can consider how the attic and cooling system interact. Comfort or efficiency concerns may involve insulation, but they can also be influenced by duct leakage, airflow, equipment condition, or other factors. Evaluating these systems together helps us avoid assuming that adding more insulation is always the appropriate solution.
Recommendations Based on Your Home
Every attic is different, so we base our recommendations on the conditions we find rather than using a one-size-fits-all approach. We can consider existing insulation type and condition, coverage, ventilation, moisture concerns, ductwork, HVAC equipment, and the intended thermal boundary to help determine an appropriate insulation strategy for your home.
FAQs About Attic Insulation Installation
Do I Need to Empty My Attic Before Insulation?
You should generally remove stored items and unnecessary clutter from areas where insulation will be installed. A clear workspace gives installers better access and reduces the chance of belongings compressing or interfering with the insulation. HVAC equipment, electrical components, and other building systems should also remain accessible.
Should Old Insulation Be Removed Before Installing New Insulation?
Not necessarily. Existing insulation may remain if it is clean, dry, properly installed, compatible with the planned upgrade, and free from significant damage or contamination. Removal may be appropriate when insulation is wet, heavily pest-contaminated, severely damaged, or needs to be moved so underlying problems can be addressed.
Can New Insulation Be Installed Over Existing Insulation?
In some cases, yes. Compatible insulation may be added over suitable existing material to increase thermal resistance or improve coverage. Before adding another layer, the existing insulation should be evaluated for moisture, pest contamination, compression, gaps, and other problems that should not simply be covered.
Should I Air Seal Before Adding Insulation?
Air sealing should generally be evaluated before new insulation covers accessible leakage points. Insulation primarily slows heat transfer, while air sealing limits uncontrolled air movement through cracks, gaps, and penetrations. Addressing appropriate air leaks first can also prevent installers from having to disturb newly installed insulation later.
Should Roof Leaks Be Fixed Before Insulating?
Yes. An active roof leak or other source of water intrusion should be appropriately repaired before new insulation is installed in the affected area. Otherwise, the new material may become wet, and existing moisture damage could be concealed rather than corrected.
Do Soffit Vents Need to Stay Open?
In a conventional vented attic that relies on soffit vents for intake air, those openings and their intended airflow pathways should remain unobstructed. Insulation should not be allowed to block the vents. Baffles or vent chutes may be used where appropriate to help maintain airflow while allowing insulation coverage near the eaves.
Should Ductwork Be Checked Before Insulation?
Yes, particularly when ducts run through the attic. Visible leaks, disconnected sections, damaged duct insulation, or other problems are generally easier to identify and address before new attic insulation makes them harder to access. Building insulation will not repair duct leakage or other mechanical problems, so the duct system should be evaluated separately when concerns are present.
Prep It Right Before You Insulate. Call Dale’s AC!
Preparing your attic before insulation installation can help uncover moisture problems, pest activity, air leaks, damaged ductwork, blocked ventilation, and other conditions that should be addressed before they are covered. Whether you are adding to existing insulation or planning new attic insulation in Port Charlotte, taking time to inspect and prepare the attic can help create a better foundation for consistent insulation coverage and appropriate thermal performance.
At Dale’s AC as a professional HVAC company in Port Charlotte, we can evaluate your attic, insulation, ductwork, and HVAC system to help determine what your property needs before installation begins. In addition to attic insulation in Port Charlotte, we provide AC maintenance in Port Charlotte, AC installation in Port Charlotte, AC replacement in Port Charlotte, air conditioning repair in Port Charlotte, Indoor air quality in Port Charlotte, residential HVAC services in Port Charlotte, and Commercial HVAC services in Port Charlotte. We also offer financing options for qualifying projects. Call us at (941) 629-1712 or contact us to schedule an evaluation and let us help you prepare your attic for the next step.